Vintage

Showing posts with label Sewing. Show all posts

Thursday, December 27, 2012

On the Third Day of Christmas...


Today I felted a bag.  I knitted a small bag out of wool yarn a few days ago.  I put the wool bag in the washer this morning and let it agitate in hot water for some time.  The original size was big enough at the opening to fit my head (yes, I tried it on :D).  It was about twelve inches tall and eight inches across.  Now, it's about seven by seven inches. 

The bag is very stiff.  It's weird to have knitted something that is now so stiff and sturdy. 

It can even stand up on its own!  :D

As you can see, the bag was very hairy and fuzzy.  It kind of reminded me of Sulley from Monsters Inc. 

"Kitty!"

To keep the locals from thinking that I was carrying a big blue behemoth, I decided that the bag needed a haircut.  ;)
This is the hairy mass left from the shearing. 


 I machine-stitched a leftover strap from a previous project. 


I also added a zipper. 

At this point, I decided that the bag needed some pizzazz,  '90s style.  Enter the pin craze!


This beauty came from a discovery on the sidewalk pavement one day up at campus.  I was walking along and suddenly I was like, "Is that the TARDIS?!"  It was awesome.  :D

This next one is an American Girl retired pin.  It's my homage to my passion for the theater. :) 


This one I got from American Life League about four years ago. 


The Peanuts are a personal favorite.  :)


I hope that none of the pins will fall off while I use the bag.  It happened to me once and now I'm afraid that I will lose one of them.  Especially the TARDIS one.  ;)


In other knitting news, I am working on a sock. 


I have a problem though.  That bit of yarn that you see?  Yeah, that's the end of the skein.  Already.  :/  Usually I can make one skein of Patons sock yarn last for one sock.  Oh well.  I'm not about to rip it out, so I'll probably buy another skein. 


I'm also working on some new legwarmers that will actually fit this time around.  They are going to be made from colorful leftover wooly yarns in a striped pattern.  I love striped patterns.  I know that they are quite simple, but something about them makes my lil' knitted heart go pitter-pat.  :D

God bless!

Wednesday, July 25, 2012

Bigger on the Inside.

As some of you may remember, I wrote a post a while back featuring my Doctor Who inspired scarf.  It was a great way to show off my fandom and was a lot of fun to make.

For those of you who may not know, the Doctor travels around in his TARDIS, which is a time-travel space ship.
Essentially it looks like this:
Picture from Wikipedia.  That's credible, right?


The TARDIS is an iconic piece of "Doctor Who" for fans everywhere.  It is instantly recognizable. 

I'm not sure where I got this. Oops.  (I love the Tenth Doctor, by the way.)

The other day a wild idea popped into my head.  "If I can't make a real TARDIS, why not make the closest thing to it?" I thought.
Yesterday saw the idea take form.  Eight hours, three empty spools, and a broken needle later, I have this.


Quite possibly the Coolest Thing Ever Made.

It is made of twill fabric and is quilted in the design of the TARDIS's panels.


I kept the design relatively simple.  I didn't want to go overboard on the details; I just wanted the basic, instantly-recognizable look.


I made an adjustable strap, which (embarrassingly) took me forever to work out how to put it together. :}

Here is my TARDIS bag with my Doctor Who favorites: the mini scarf and my journal that looks like River Song's journal (Spoilers!).


And for those of you who are wondering if it's bigger on the inside, come and see for yourself.  :)

Friday, July 20, 2012

Camera Cozy and a Dress for Tiny Felicity

Some of you might remember my first post called A Window Into the Past... which described using vintage fabric as a sort of portal (not literally) into a specific time when the fabric was made.  I have recently been messing around with this fabric once more.  


About a week ago, I decided that my camera needed a new case.  The old one was also handmade, but it was very much, shall we say, a prototype.  Not very well done at all.


I decided that, like the previous case, this new-and-improved one should also be quilted.
I quilted it much more tightly  so that it would look right.


The new case was also meant to show off my knitting skills.


I knitted a simple stockinette stitch sleeve and used a knitting spool to craft the wristband.


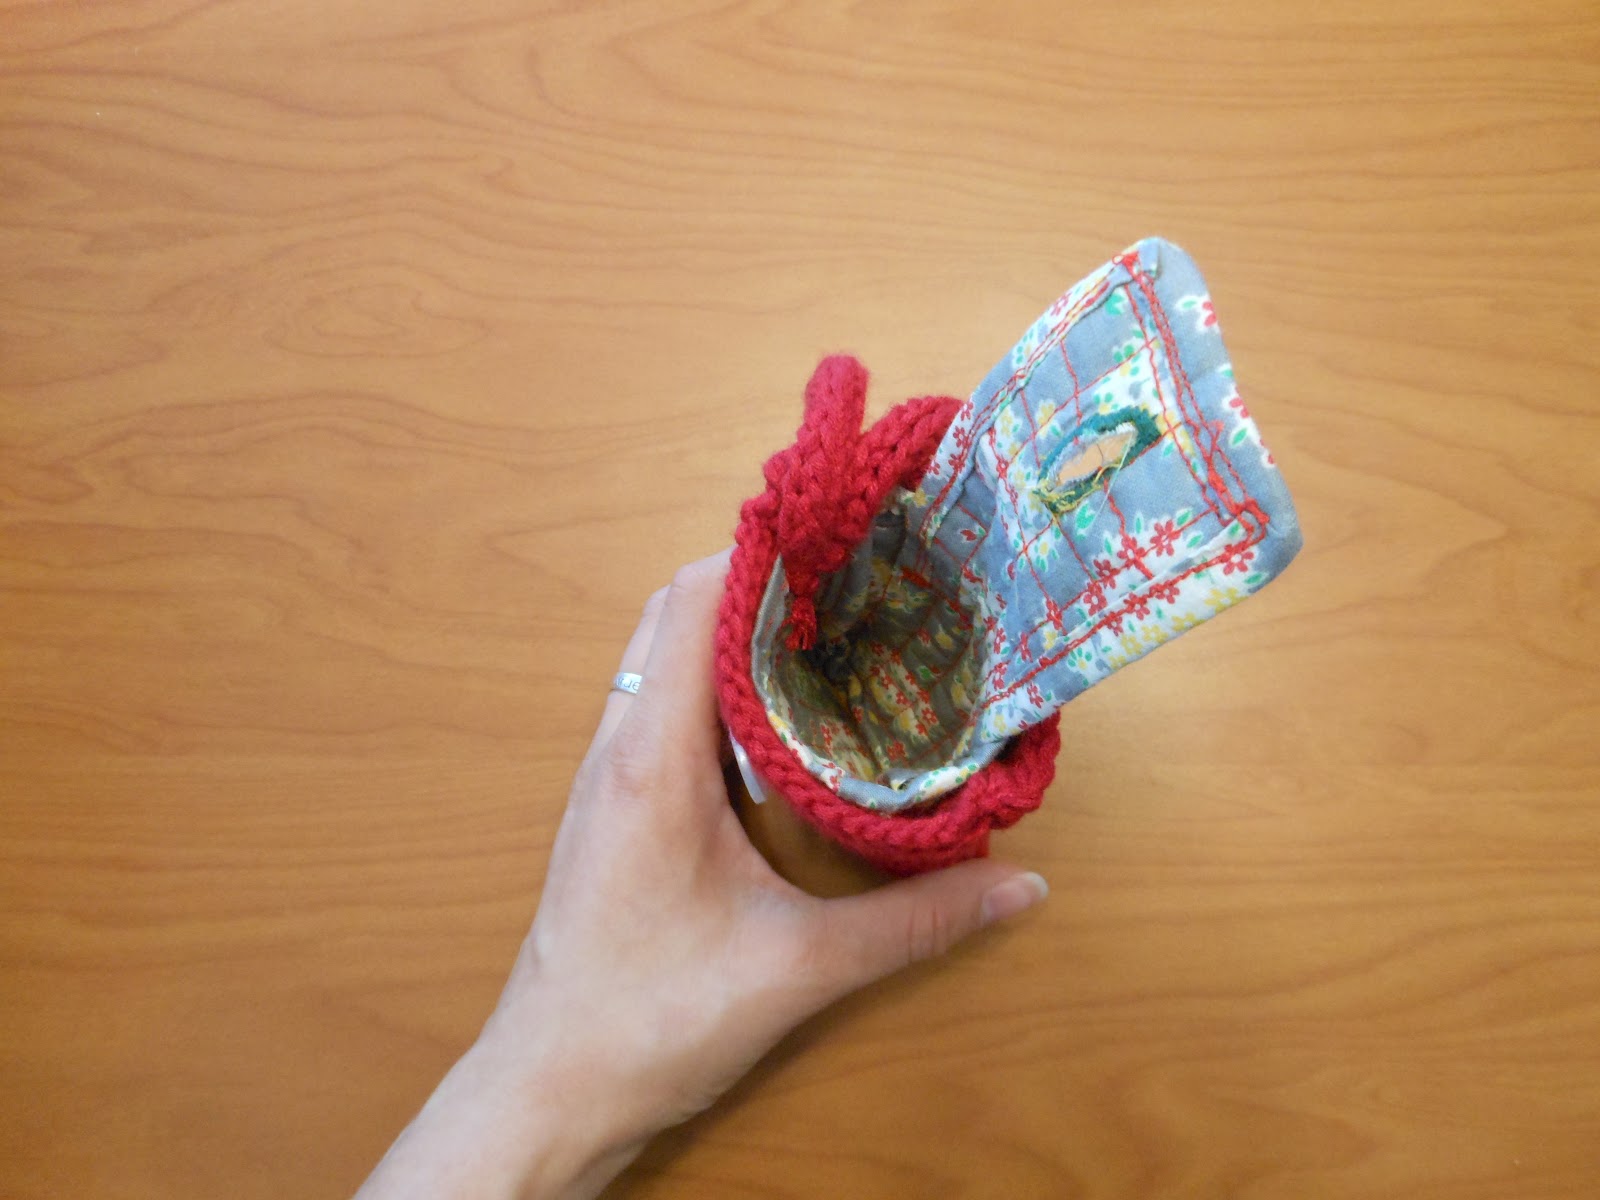
The quilted section I put on the inside with the knitted sleeve covering it.
The two layers are connected at the wristband and button only.  The rest is left open.  They fit so snugly together that I did not need to sew them into one piece completely.


A picture to show the inside.  The case (amazingly!) fits like a glove on the camera. :)


The second project I completed this week was a dress for my first sister's doll, Felicity.  I should mention that her Felicity doll is a mini one.
It was like sewing a dress for Thumbelina. ;)


First Sister was ecstatic with the results.  Doesn't Felicity look cute?


And yes, this is the second post this week with dolls in it.  Hey, I'm a girl.  I'm allowed.  ;)

Sunday, June 17, 2012

A Hobbes for my Dad.


 So for quite some time now, my dad has been asking me to make him a stuffed Hobbes.  Hobbes was one of the main characters in the comic strip Calvin and Hobbes that appeared from the mid 80's to the mid 90's or so.  To all unsuspecting humans, Hobbes looks like an ordinary stuffed tiger.  To Calvin though, Hobbes is alive and real like any other person.

Dad showed me an Instructables pattern gives step-by-step instructions on how to make your own Hobbes.  It is a great tutorial, very thorough and chock-full of pictures.  I printed out the pattern and began work.


The pattern didn't list any specific yardage for the fabric, so I guessed about half a yard each of orange, black, and white.  I used smooth broadcloth instead of fleece so that it would last longer and look better. 


The first thing I sewed was the tummy with my sewing machine.  I sewed as much as I could with the machine, because I had a lot of hand sewing to do.

I also put some beads in the end of the tail to weigh it down.  The tail actually became quite useful in the end, because it helps balance Hobbes so he can sit up.


Here he is all laid out before I sewed on the appendages.  

In fact, that picture kinda reminds me of this Calvin and Hobbes strip, one of my personal favorites:
Cracks me up every time!


And here is Hobbes in all his glory!

Happy Father's Day, Dad!  I love you so much!

Another strip for good measure.  ;)

Wednesday, June 6, 2012

18th Century Pockets!

A really long time ago, before there were such things as Levi's Jeans, there were pockets.  In the eighteenth century (and probably before), women wore pockets underneath their skirts.  Their skirts had slits on the side that made it easy to reach their pockets.  The pockets were separate from their dresses, and were tied around the waist.
I decided to make my own pockets this past weekend.  I work as a docent (history enthusiast who gives tours at historic places).  The house I work at is actually an interpretive center that is a replica of a house built around 1795.

Here are a set of pockets in the process of being put together.


This pocket is more of a work-in-progress.  I lined the front part of the pocket so that the slit would look nice.  Here it is from the inside.


I took long strips of off-white (also called "unbleached") cotton muslin to make the ties.

Here is the set of pockets completed.  I made two sets, one for myself and another for a fellow docent.  This set is for my friend.  I made a casing at the top of the pockets so that they could be adjusted along the tie.

Here is my set, complete with iPod to show the size. ;)
 Some people insist that they were worn on the outside of the skirt, but I beg to differ.  I mean, if I have a lot of things in my pockets (and believe me, I probably will), I'd much rather others not see my bulging pockets. ;)

Have a great week!

Monday, May 28, 2012

Captain America shield quilt

I have made it a tradition to make each of my brothers and sisters a quilt for their thirteenth birthday.  I am on the third (and last!) brother at this point.  When I asked him what color he wanted for his quilt, he said that he wanted it all red.  I flinched at this idea.  I mean, have you ever seen a red quilt?  ;)  The color would be a bit too much, never mind the fact that it would take forever to find fabric the same shade of red. ;)
So I decided that I would give my aunt a call.  She helped me think of other ways to express my brother's personality, but without the fiery color scheme.


This is what I came up with.
I drew two designs with Captain America (my brother's favorite superhero/Avenger) in mind. The one on the bottom is the design I went with.  If you use your imagination, it looks like the Cap's famous shield.

Fast forward a week or so.  This is what I had this morning.  My grandma told me about a specific kind of quilting about a year ago. The idea is to sew medium-size blocks separately. The quilt top is not sewn together until later. 

 I sewed the quilt top in four blocks.  I then cut the batting to fit the block.  The backing was cut slightly larger ( you'll see why this is important in a minute). Here is a picture of the layers. 

After the pieces are cut and pinned together, they can be machine quilted.  


I try as best I can to make sure the pieces are all even, but it doesn't always turn out perfectly.  :S  


 Another important thing to remember is to not machine quilt from edge to edge.  You must leave about an inch at the beginning and the end, as you can see here:


 When you have all the pieces quilted, you can begin to sew them together.  Lay the blocks with the tops facing each other.  Sew the batting and quilt tops together, but leave the backing alone.  When you have sewn them, it should look like this. 
 Trim the excess batting.

Lay the attached blocks with the top facing down. 


 Fold one edge over the other and pin it down.  This is why you left one inch all the way around each block not sewn.  Trim the fabric if the seam becomes too bulky for your machine.  After all, you don't want to break a needle! ;)

Here are the two halves coming together, a momentous occasion. ;)
Sorry the picture is sideways, by the way. 


And here is the completed quilt!  I am so glad that I am done with it.  I made several mistakes, including not buying enough red fabric (and going back to Hancock Fabrics twice) and even sewing two blocks together the wrong way!  


Despite these problems, I did manage to finish it in about ten days! My brother is really happy with it, and I think it will be around for a long time.  ;)